Hi All,
UPDATE: Video tutorial for this is available here - pleated poltam skirt video tutorial - No lining
After you have gathered and pleated your skirt, its now the final step. - Attach elastic and hem the skirt. So let's dive in.
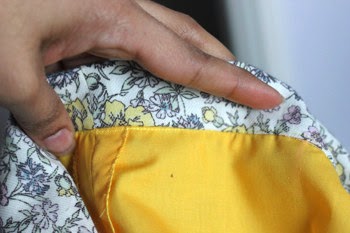
1. Now fold under the waistband on the back of the skirt.
2. Pin just on top of the stitching line
3. Make sure the waistband width is 0.4 cm to 0.5 cm more than the elastic width.Adjust if needed
4. Now sew just covering the stitching line (only the back not the front).
5. You can see here that my new stitching line is a bit on the skirt part and bit of the waistband part. It will not be seen so fine. It may come perfectly for you on the waistband if your cutting and sewing is accurate.
6. Now sew the top of waistband at the back only just catching the waistband. This looks neat and keeps the waistband in place. I've had many failed attempts and learnt this. I also fixed twisted elastic from my leaning from making flat front back elastic skirt. But we will go a step further as well. :)
7. You can see here that the front of the skirt waistband is still open.
8. Set you machine to zig zag stitch and finish both ends of the elastic and attach a safety pin.
9. Insert at one end of the skirt.
10. Insert till there is only 1cm left at the end it was inserted.
11. Pin it to secure and continue till the elastic comes off the other end and then pin at 1 cm. Remove the safety pin. :). Now is the time to try the skirt for fit.
1. If its loose take in a little more of elastic.
2. If its tight then leave only 0.5 cm of elastic to be sewed.
3. If its too tight something is wrong. You'd need to take another elastic longer than the current one and insert again.
12. Now sew back and forth at the seam line where you have pinned the elastic. I sew about 4 times to secure the elastic.
13. Now we will sew in the middle of the waistband. Pull the waistband (right hand pulls in front and left behind if you are right handed) and sew in the middle.
14. Finished back. :)
15. Fold under 1 cm for lining (wrong sides together) and again another 1 cm and press.
16. Sew. Repeat the same for the fabric as well with first fold of 1 cm and 2nd fold hem allowance (2cm in my case).
That's it. You are done.
Let me know if something isn't clear.
Thanks,
Preethi.


No comments:
Post a Comment