Tuesday, 29 April 2014

A disaster tunic with sheer fabric

I'm now learning to make ePattern (you can check my progress here) and I made a basic tunic pattern. I have always been thinking of making something with sheer fabric and I thought perfect to give it a try. Let me tell you, it was a disaster. Total !!
Sorry I took the photos in bright sun, you can hardly make out. It kind of looks ok in photos but really bad it was. It has collars and I didn't use any interfacing there. I don't know what was in my mind.  It is so short - had I made it shorter it could be a top but then I'll have to do something with the collar.

Learning:
1. Always Interface collars
2. I made a slit on the back for buttons and it was really easy and quick to do.

Tunic
Tunic
Tunic
Had been to fabric shopping today. Oh what fun!! Have just put them for a quick wash. I'll show them to you  tomorrow. I actually went shopping for nighty fabric and have brought back whole lot of linen fabric. They were so good I couldn't resist. I'm just thinking the nighty hardly looks like a nighty so I could as well use the same patten out of linen that can be worn outside as well. ;) Is that cheating? :)

If you enjoyed reading this you can either like my facebook page to get all updates and more or you can opt to receive posts via email. Don't forget to activate your subscription though!

Saturday, 26 April 2014

nightie - first try

Thanks all who said they wanted to see the next free pattern-  a nightie. I'm learning to make an epattern and you can see how I'm  getting along here.

The one that I'm showing below is done by just tracing around one of the t-shirts of my daughter as the ePattern is not yet ready.
Well I know it is meant to be a nightie and I'm supposed to make it longer. :) But that is all the fabric I had and I really wanted to get started. The light blue is lining left over from the phus phus skirt and the dark blue is the lining left over from poltam skirt.

I used the breadth of the fabric and there is no side seams. One less (or rather 2 ) work to do. :)
Even the yoke to the body attachment is all hidden. It came out really neat, sorry I didn't iron before taking a photo.
Attaching the trimming - oh go it wrong once and after finishing I realised I did another mistake. Scroll down to see.

You can see in the above photo the trimming has gone under the fabric. I sew the trimming on the right side before attaching the shoulders - what was I thinking. Learning!!
Should have got a close up photo to show you.

Once I finish the ePattern then I'll make another one. I've a half meter fabric. Will try with that and perfect the body and then I can then add length later :)

Have a good Sunday!!

If you enjoyed reading this you can either like my facebook page to get all updates and more or you can opt to receive posts via email. Don't forget to activate your subscription though!

Friday, 25 April 2014

ePatterns - Learning to make one

I've been really really busy learning to draw the pattern to make it downloadable - ePatterns .. let me tell you; Uff!!!! its hard work and worse there is not much available online to learn from.
I'm breaking my head to learn it. There are some posts available on how to create them using illustrator or how to trace it from a hand drawn one. But....
I don't have the money for illustrator and neither I'm hand drawing one so I'm basically creating from scratch on inkscape. Its free but has a steep learning curve. I'm sure it would have been the same with illustrator as well. But yeah, I'm getting there.

Here is a glimpse of how my drafting is coming along. :)
What a mess :) Don't laugh :)
Not long for a pattern hopefully once I get this going and test a few dresses.
I already have one that I tried by just eye balling the pattern pieces, but I'd need to test this from the download - once it is ready of course
Can't wait to share it with you. :)

If you enjoyed reading this you can either like my facebook page to get all updates and more or you can opt to receive posts via email. Don't forget to activate your subscription though!

Tuesday, 15 April 2014

Free next pattern- What would you like?

Hi All,

I'm reaching out to you in the hope to get a reply. I've been thinking of what my next pattern should be.

This blog is more like an information blog (mostly one way), it is not yet a communication blog and I really want it to be.
I haven't spread the word in my circle so I cannot expect much, just giving it a try asking for a reply considering I get about 1000 views a day. It's just this anonymous person in this anonymous world, but yes soon it will be a communication blog; its just that I'm not confident enough to share.


So, coming back - I'm thinking of 2 options
1. nightie for kids - might be ideal for summer
OR
2. divided skirt - due to heat stockings is not an option and I don't like the nappy to show, so this might suit that it is a skirt and the nappy won't show as well as it have a divide between the skirt?

Both patterns would require me to learn to put together a pdf pattern. I don't know to start, but I'll give it my best :)

If you have any suggestions, photos anything you want to share of what you would like the next pattern, please leave a comment or you can send to widicreations(at)yahoo(dot)com..

Many Thanks,
Preethi.

If you enjoyed reading this you can either like my facebook page to get all updates and more or you can opt to receive posts via email. Don't forget to activate your subscription though!

Saturday, 12 April 2014

Nirma skirt of rayon fabric

I always wanted to make the nirma skirt (free pattern) with rayon fabric and when I found this at the toni textiles in london Goldhawk road I was super excited to make the skirt.
Rayon is very soft and is natural - best for my little girl I thought.

FREE PATTERN - FULL INSTRUCTIONS AND VIDEO HERE

Now that my pattern is fully ready and published, I've dared to make it with a little slippery fabric. I used fabric starch for the hem and used the double fold method to finish the hem.

Really enjoyed making the skirt, and the best part was one of the ladies at toddler group asked where I bought it :).
As usual I couldn't stop blushing as I told her " I MADE IT" :)
As it is KCW week, I've been sewing a lot. I may not probably sew the next 1 week if I can resist myself not to sew :) 


Video here 


Thanks,
Preethi.

If you enjoyed reading this you can either like my facebook page to get all updates and more or you can opt to receive posts via email. Don't forget to activate your subscription though!

Friday, 11 April 2014

Nirma skirt - free pattern final practice

Hi All,

This was my final practice before I put up the pattern. For the full pattern, instructions and video goto Nirma skirt free pattern.
Enjoy some photos.


Thank you!


Thanks,
Preethi.

If you enjoyed reading this you can either like my facebook page to get all updates and more or you can opt to receive posts via email. Don't forget to activate your subscription though!

Thursday, 10 April 2014

Nirma skirt - Free pattern

Hi ladies,
Another free pattern - the much awaited Nirma skirt.This is a super twirly skirt that I totally totally love.
Nirma twirly skirt epattern with calculator and step by step instructions

Below are some of them I made before and during the pattern and tweaked the pattern learning along the way. 2 other skirts that I could not photo along the 3 below are nirma skirt for colleague's daughter and other for my daughter's friend. 

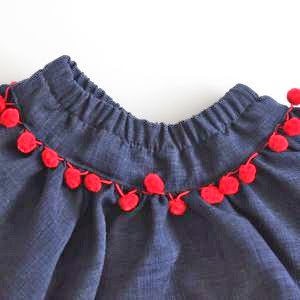
Free skirt pattern for girls Image Map 1 hour Nirma skirt Nirma skirt video showing twirl Nirma skirt with contrast pom poms
Nirma skirt full instructions


Nirma skirt Introduction
Nirma skirt Supplies
Nirma skirt calculate pattern pieces
1. VIDEO INTRODUCTION TO NIRMA SKIRT 2. SUPPLIES 3. CALCULATE PATTERN PIECES, FABRIC, CUTTING LAYOUT - WITH VIDEO
How to choose fabric
How to cut circle skirt with no fabric wasted
Nirma skirt Cut fabric
4. CHOOSING FABRIC 5. CUTTING LAYOUT EXPLAINED WITH VIDEO 6. CUT FABRIC  - WITH VIDEO
Sew waistband to skirt
2 ways to insert elastic in nirma skirt
4 ways to hem nirma skirt
7. SEW WAISTBAND TO SKIRT 8. 2 WAYS TO INSERT ELASTIC 9. 4 WAYS TO HEM


Nirma skirt flickr photos
 

If you enjoyed reading this you can either like my facebook page to get all updates and more or you can opt to receive posts via email. Don't forget to activate your subscription though!

Introducing Nirma skirt

Finally I tell you why it is called Nirma skirt.
For full instructions of Nirma skirt pls goto - Nirma skirt free pattern. 


When I made the first skirt for daughter's friend it totally reminded me of the Nirma ad we used to watch on television when little.
Washing powder nirma :). (Sorry people outside India)

Nirma, washing powder nirma,
doodh si safedi, nirma se aaye,
rangeen kapda bhi khil khil jaaye,
sabki pasand nirma, washing powder nirma, nirma!


The pattern is not exactly the same though. It has huge circle skirt attached to a rather large waistband.
It is more like a gathered circle skirt. A super quick video introduction to the skirt below - this is what I'll try to show you how to make :)
So lets get started. If you cannot see video below click here


You can see how it twirls in the below video that I had posted  here when I made the Nirma skirt for daughter.
If you cannot see the below video click here

Thanks,
Preethi.

If you enjoyed reading this you can either like my facebook page to get all updates and more or you can opt to receive posts via email. Don't forget to activate your subscription though!

Nirma skirt - 2 ways to insert elastic

I'll here show you 2 ways to insert elastic - the first is done  less than a minute and the second is more traditional way.

For full instructions to make a Nirma skirt pls goto NIRMA SKIRT FREE PATTERN.

1. Direct way (Cannot be tested before finishing, need to know the size before hand, done in less than a minute)


I've used  this method for all the nirma skirts I've sewn.


Detailed steps below:
 1. zig zag finish or with serger finish the raw edges of the elastic separately and then sew 1cm from the edge. Generally when I use this method the elastic streches out a bit so I trim the elastic another 2 cm before starting out. It might depend on the elastic quality though Im not sure.
 2. Flatten the elastic by sewing over the seams. This keep it flat in the waistband.
 3. Mark the center and quarter points on the elastic and start to align.
 4. Align and pin the side seam with the seam of the elastic by turning under 1 cm.
 5. Align all the 8 point and pin with 1 cm turned under the wrong side ie wrong sides together with elastic in between.
 6. This is how it looks - More fabric between the elastic. This way to do involves more pinning than sewing when compared to first way.
 7. Now fold under with elastic towards wrong side with elastic tight inside.
 8. Do it all the way.
 9. Now pull the waistband and see if it pulls all the way. Sometimes what happens is there is more elastic than fabric then this causes a big problem. There is no way to adjust, so its best to pull now and see if its ok.
Yeah, I haven't yet removed the gathering stitches:)
 10. Pulling elastic with both hands in opposite direction sew on the waistband & elastic together at the inner side of the waistband.
 11. No twist elastic in a minute.
12. Looks neat and now after sewing so many skirts I know the measurements for it was a breeze.


Done!!


2. Phus phus skirt way (Foolproof, Time consuming, can be tested before finishing) 

Steps 1 and 3 are the traditional way to insert. Steps 1 and 4 help it not twisting.
1. sew the waistband first
2. Top stitch the top edge of the waistband
3. insert elastic with a safety pin (all over since this is not a flat front skirt).
4. Pull elastic with waistband and stitch in middle.

If you enjoyed reading this you can either like my facebook page to get all updates and more or you can opt to receive posts via email. Don't forget to activate your subscription though!

Related Posts Plugin for WordPress, Blogger...