Wednesday, 30 September 2015

Culottes in Triple Crepe

A simple pattern made with some gorgeous fabric is a WIN in every way I think. Don't you?
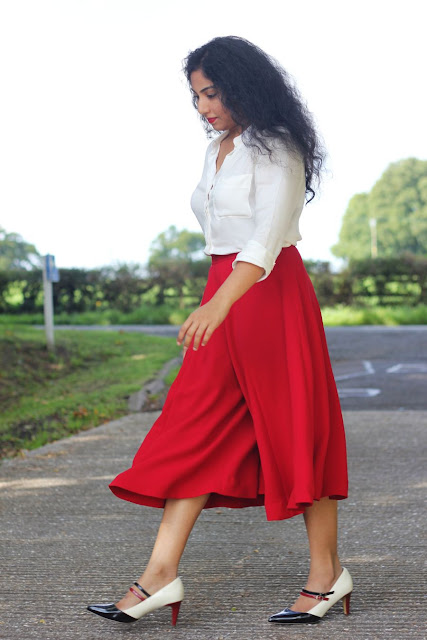
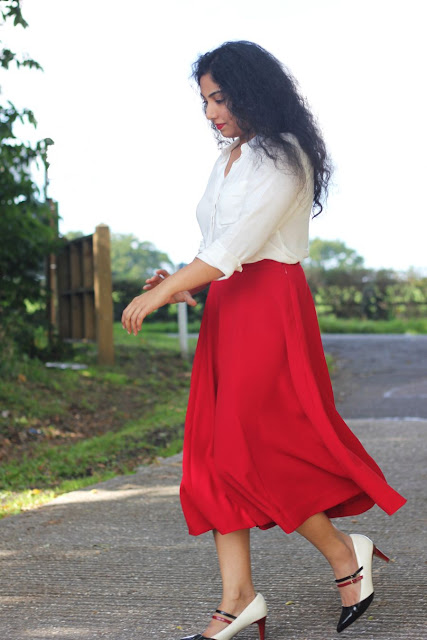
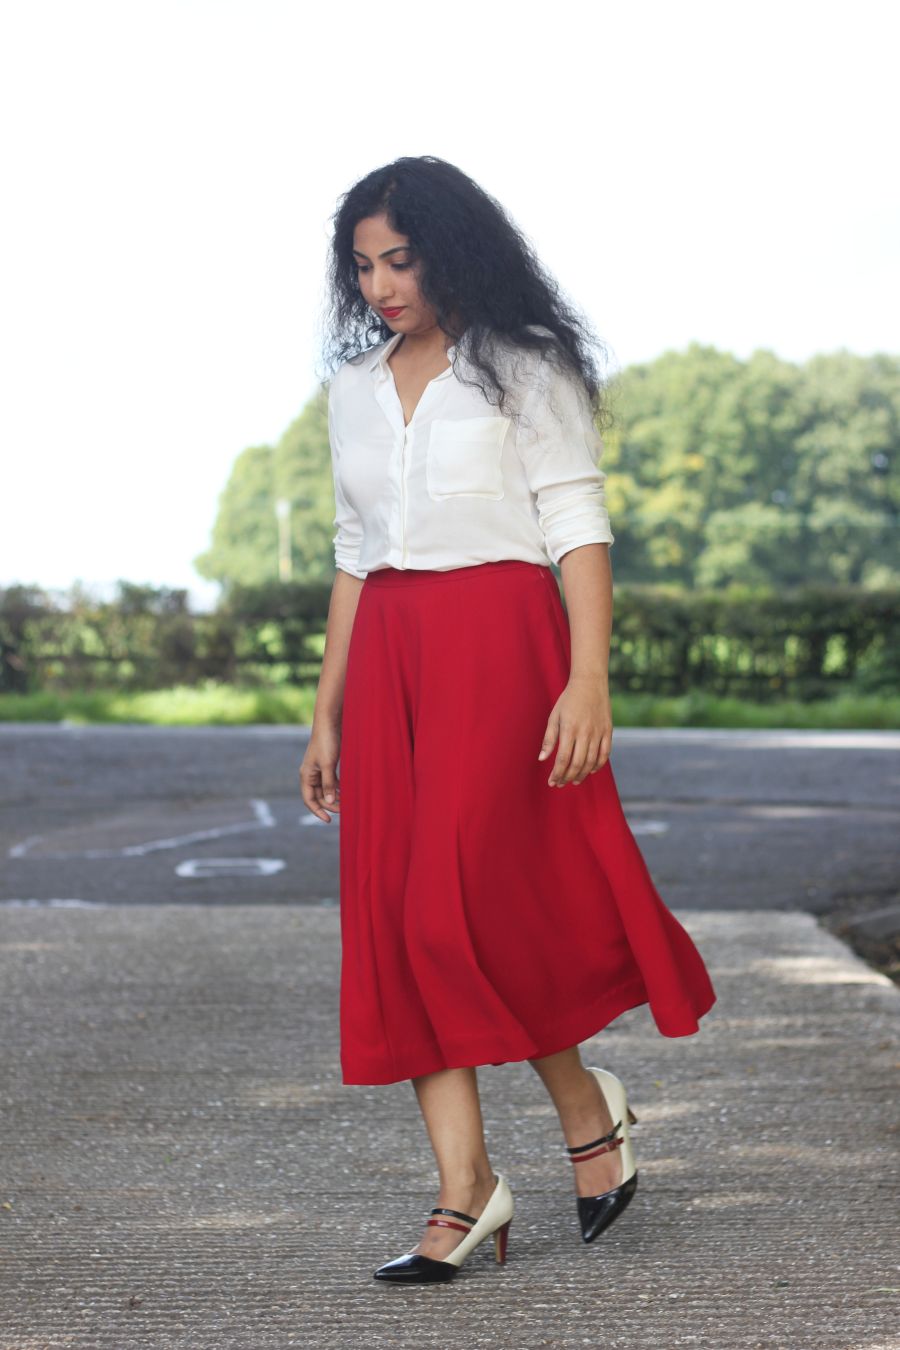
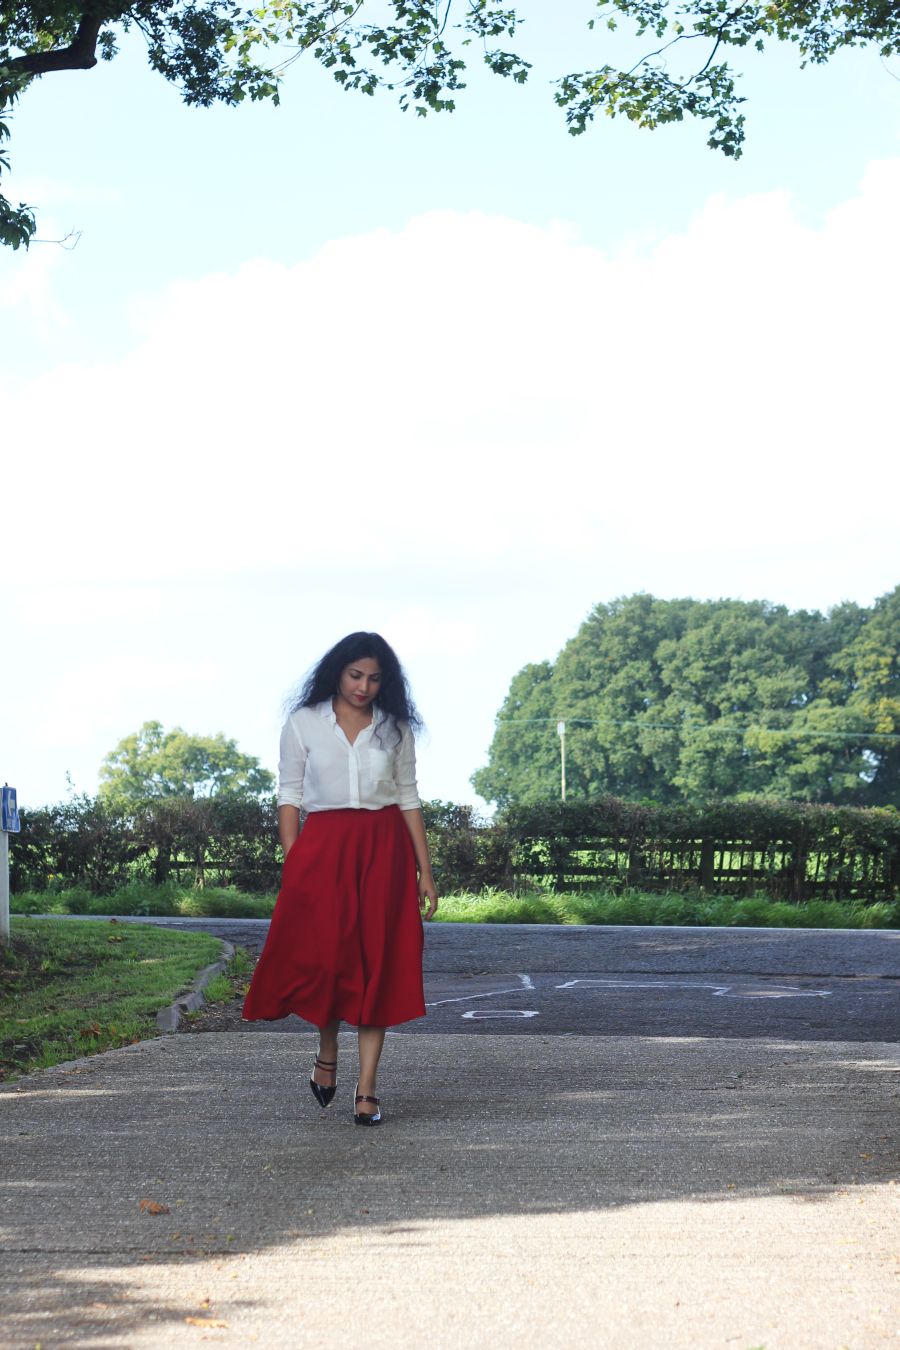
Red Long Culottes

The fabric is so lovely - this deep red triple crepe from minerva crafts is just so gorgeous, I didn't want to cut it at all.. No really its so gorgeous the fall is so graceful.
I want even sure after I bought the fabric is culottes is the right choice.
I used Butterick B6179 which states fast and easy and it is really. Having had not much experience in using patterns, I really wasn't sure. 
I have used a pattern before but never went to finish it. This was the first time I've finished something that is made from a ready pattern not made by me. 
Red Long Skirt

DIY Long Culottes

Culottes in Red


Pattern Description: B6179 D I made the pattern D Culottes version. It has a zipper at the back, side pockets, no lining, waistband. 

Fabric Used: Triple crepe in Red.

Pattern Sizing: This was the most disappointing part.I bought the pattern sizing 6-14. My waist is 80.6 cm. I measured the waist on the pattern by walking the pattern; the finished garment didn't mention of waist at all. The waist after measuring on the pattern pieces of size 14 (waist on patterns 5+2+6+4 times 2  minus the seam allowances) gave 78.8. This was 1.8 less than the largest size on the pattern. So I added 0.5 cm on side seams of pattern 2 and 4. Well I like no ease on the waist so just went by my waist measurement.

Did it look like the photo/drawing on the pattern envelope once you were done? More than I guess. I've made 2 now and would make more.  

Were the instructions easy to follow? Yes

What did you particularly like or dislike about the pattern? I didnt like the back zipper. Could work for a skirt but definitely not culottes. May be I wouldnt use them on skirt as well if I'm honest. The details on the flap for waistband werent very clear.  But then I didnt read it very well. I had recently made a skirt where it worked beautifully so just followed what I already knew.

Pattern alterations or any design changes you made: Well….I made a muslin first and I looked like a ball... so I wasnt really sure.. Well you know how calico stands, I still went ahead and glad I did. 
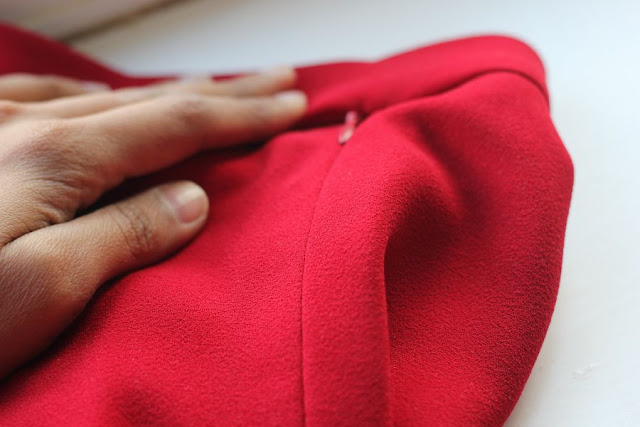
1. I changed the back zip to side.
2. Instead of 2 pockets I just made 1.
3. Did my own waistband and attaching to the skirt.
4. Used buckrum for waistband for interfacing.
5. Increased size as I'm larger than largest size on the pattern I bought.
Would you sew it again? Yes, Yes, Yes.


Triple Crepe fabric in Red DIY

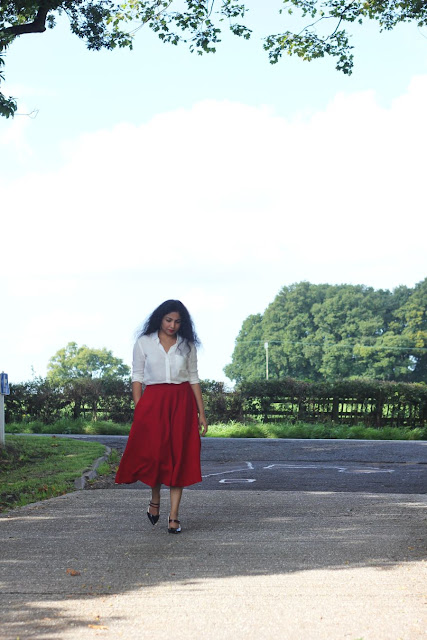
How to pose for Blog photos

red skirt with plain white shirt

Simple dressing in white crisp shirt
Selvage for waistband
 I used the fabric selvages as the waistband as that is the strongest part of the fabric. This was something I learnt from the Islander sewing systems.The wrong side is not turned over so I dont have to worry about accuracy here.
waistband stitch in the ditch
 The waistband is thick enough to hold the heavy skirt.. yes the skirt may atleast be 2kilos.
waistband thickness

Zipper on skirt
 Zip - Ok I may have sewn alteast 30-40 zips in the last 2 months and now I have all the info to give the out to you. wait for this ;)
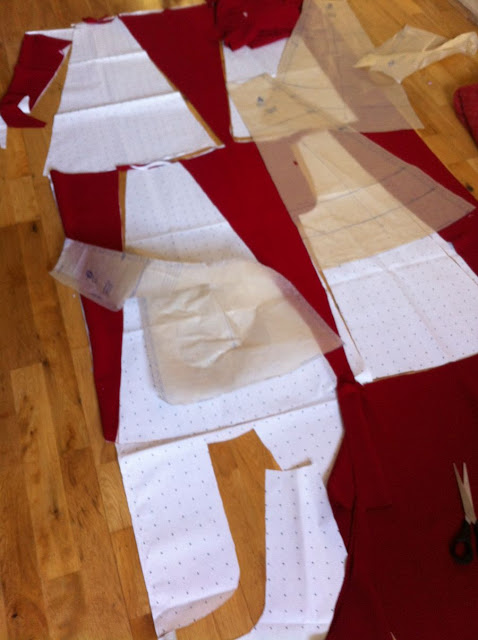
Paper underneath slippery fabric to cut
 This was how I lay out my fabric.I used paper underneath for extra support whist cutting and it turned out beautiful.
washi tapes for marking
 I used washi tapes to mark the wrong side of the fabric. This crepe is so similar on both sides its hard to make out and with cutting layout having on folds and on single layer of fabric its important to mark the right and wrong. 
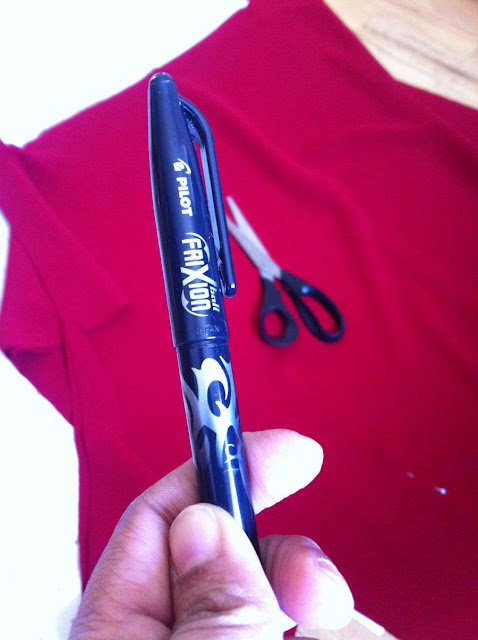
Steam vanish pilot pens for fabric
 I used these amazing pens that just vanish with steam.. Its so amazing you should give it a go.
waistband buckrum
 I used buckrum from my local fabric shop and stiched them on the inside of the waistband. What it does is just amazing.
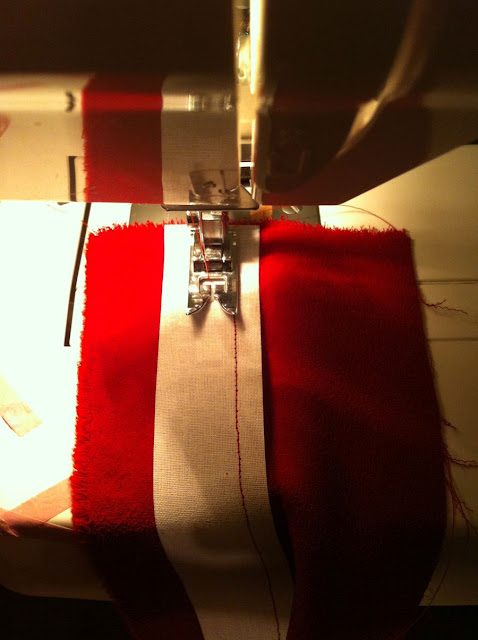
waistband buckrum stitching
I made 2 rows of stitching.
Really pleased with how it has turned out. Let me know what you think.

Thanks,
Preethi.

If you enjoyed reading this you can either like my facebook page to get all updates and more or you can opt to receive posts via email. Don't forget to activate your subscription though!

Tuesday, 4 August 2015

Vionett - Queen of bias; where did I go wrong

I know what is bias. I've closely seen how cloth is hand woven, done it myself on the loom. My husband comes from Paramakudi where the main source of income is hand weaving.
When you see how cloth is woven you understand how bias works, why there is no stretch on lengthwise grain and some on cross and lots on bias. A representation is below

What is bias, cross wise grain and lengthwise grain

What is bias, cross grain and lengthwise grain


I made a bias skirt (self drafted) on muslin and it looked great, well almost..

Self drafted Bias skirt

Self drafted bias skirt

DIY skirt


I used the same pattern and made the same using faux suede and everything went downhill.. I did staystitch immediately after cutting, no idea how it stretched out.

Bias Skirt Stretch

Any help?

Bias skirt stretched out issue

Bias waist stretched out

I've been learning a lot about bias ever since I made the gathered circle skirt for my daughter -

gathered circle skirt

You can see on the sides how it has stretched out. One things for sure - whoever said circle skirts are easy are just lying.

An excellent video here on bias -
How much gravity has to do with bias - Its such an interesting watch .
We would think of bias as given, but so much thought has gone into it before it has come into textbooks

Madeleine Vionnet- Queen of bias cut - inspiration for designers like Chanel, Lagerfield, Valentino


And here is an excellent file for keeps on bias. A little over the head for me at the moment for its for keeps.. slowly one I'll get the grips to it -

45 degree magic 

Enjoy!
Preethi.


If you enjoyed reading this you can either like my facebook page to get all updates and more or you can opt to receive posts via email. Don't forget to activate your subscription though!

Saturday, 1 August 2015

Self drafted Bias Skirt - scary!!

Bias is something that always scares me... My first experience was the gathered circle skirt I made for my daughter.

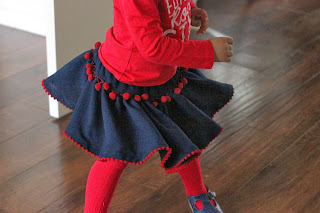
You can see below at the front how it is stretched out.
Gathered circle skirt

Here again at the side you can see how it is stretched out.

pom pom skirt
All over the internet there is circle skirt as a simple skirt- but seriously how ? How can one understand bias and its handling.  I think skirts to start with are simple gathered skirts.

I've made a bias skirt pattern for myself and made it out of calico, this calico is bit thick so the fall is not very apparant. Hopefully the faux suede will do a good fall.

self drafted bias skirt

self drafted bias skirt front

The material has a great fall, so wait and see..To test the fall - you can see this post to buy a drapey fabric.
faux suede fabric


Enjoy your weekend :)
Preethi

If you enjoyed reading this you can either like my facebook page to get all updates and more or you can opt to receive posts via email. Don't forget to activate your subscription though!

Thursday, 30 July 2015

Conquered the invisble zipper

Ahhh!! Finally conquered the zipper..
Do you dread the invisible zipper or any zipper? I DID. Not anymore
Best way to insert invisible zipper


I had so many questions -

Invisible Zipper Issues

Which way to place the zipper?
Do I need to iron my zipper?
If so, what setting?
Which foot to use? Worst my machine doesnt even support the invisible zipper foot.
Use tape or pins?
Baste?
Can't get close enough. What to do?
The seams at waist don't match up, what to do?
The neck now is one up one down, what to do?
Why is the invisble zipper visible from the correct side?
Ok, I know the zipper, what about facing?


I was once at this stage - Zipper foot not working - The needle went straight down the zipper teeth.


And then at this -
Invisible zipper mistakes


where I got the right foot but my tenchique was wrong. The zipper was showing from right side, it was all wonky, seams never matched.

And now (happy face)


Invisible zipper with regular zipper foot
Please dont notice the zipper colour, was in a hurry to finish off the skirt.. the fit was so good I couldnt resist to finish it off.
It's a pencil skirt by the way if you are wondering.

Imprevement - I could do better with matching of the circles at both patterns. But I could live with it for now.
If you'd like to have my lessons learnt and tutorial let me know :)

-Preethi.

If you enjoyed reading this you can either like my facebook page to get all updates and more or you can opt to receive posts via email. Don't forget to activate your subscription though!

Wednesday, 10 June 2015

Sewing - Still a beginner

When I was sewing for my daughter I was churning out stuff so quick. I was new and was willing to try various things and fail several times. For some reason now that I've progressed to sew
for myself I want to know ways and to perfect things. I'm taking several online courses. There is so much I want to do and so little that I'm able to.
To think of it I still don't know most basic stuff, I've a long way before I can come up with something decent for myself.
Sewing Learning basic techniques

Here is my to do list.

1. Draft a sleeveless blouse from the basic bodice for myself.  I'm on the way. I've a good moulage I made for myself so Ithink I should be able to do this one.

2. Draft a skirt sloper.I'm wearing a lot of skirts these days.. Bought so many from east.co.uk. I'm loving them. So I thought why not try sewing them for the summer.

3. Invisible zipper on waist with waistband. Haven't found a good tutorial yet on this. The best and most logical tutorial for the zipper on back from neck facing is this from fashion incubator - Such beautifully calculated for the fold of the fabric. I'd do it slightly differenlty though, instead of a different pattern piece, I'd just move the facing pattern slightly right to compensate for the fold of the main fabric.

Enjoy your week!
Preethi.

If you enjoyed reading this you can either like my facebook page to get all updates and more or you can opt to receive posts via email. Don't forget to activate your subscription though!

Thursday, 12 March 2015

How to ease sleeve cap by crimping - easy quick and no frustration way

Sleeves are always tricky. Aren't they?

How to ease sleeve cap for set in sleeves


Ever wondered how on earth does the arm hole match up to the circumference of the sleeves?
Why don't sleeve and arm hole match for a garment with no gathered sleeves?
A poorly made set in sleeve can scream homemade, not that I'm ashamed of it though. :)

The sleeve circumference is so much larger that it becomes so difficult to do it without puckers.
Some upto 3 cm. Well it also depends on the type of fabric (knit, woven). You should comfortably be able to rise your arms up.

I have the tried the following options:

1. The gathering way (2 rows or 3 rows) but it always ends up with puckers which almost look like gathers. Yeah! gathering way produces gathers, atleast for me.
2. The finger pressing way (the heat in the fingers does help to manipulate the fabric) but it takes ages to get it right. It's frustrating to say the least. Divide and conquer way it is.
3. Crimping way - The easiest and simplest and quickest and bestest. No more frustration or patience required.


I have read this in a couple of fashion books without pictures so had to do a number of trail and error to get this right. So let's see how to do it. Below is the video.
Set the stitch length to 3. Max is 4 on my machine Guess I forgot to mention in video.

Do you need to finish the sleeve (sleeve seam, finish raw edges and hem) first or after crimping/easing?

I have done both ways and both have pros and cons.
If you finish the sleeve it becomes slightly difficult to crimp because it is difficult to lay flat - you could always remove the tray to make it easier.
But if you don't finish the sleeve then the threads may come in the way when you finish. You could always tie a knot but then when you start to pin it up against the arm hole you may need to adjust.
I'd prefer to finish the sleeve first.


Don't forget to let me know if it worked for you.
After you have eased you'd need to match up the notches or the dots and pin up at few points before you stitch. Sorry should have taken a few pics there, may be next time!
Happy stitching!
Preethi.

If you enjoyed reading this you can either like my facebook page to get all updates and more or you can opt to receive posts via email. Don't forget to activate your subscription though!

Friday, 28 November 2014

Crimping sleeve ease

Just checking, how have you been?
I don't have a blog post with me, but I can't wait to show you the sleeve I made.
I used the crimping the method. I have seen the crimping method in text books but haven't seen them in blogs or videos. It has taken me quite an effort to get it right. But once I did wow the whole sleeve easing was a breeze.

UPDATE - Blogged with video here - How to ease sleeves crimping way - Easy, simple, Quick - No more frustration

No more 2 rows of gathering - what rubbish!  hahha .. Sorry
Crimping sleeve ease
Sorry about the photo. Just took it late night. I was so thrilled. And I have to show you what I'm making.
Do you use the crimping method?
Do you want a video of it? Pictures may not work here.
Have a good weekend!
Preethi.

If you enjoyed reading this you can either like my facebook page to get all updates and more or you can opt to receive posts via email. Don't forget to activate your subscription though!

Related Posts Plugin for WordPress, Blogger...